Make them this weekend, freeze them, and cross dessert off your Thanksgiving list for good.
Last year, I watched my cousin Rebecca—who normally has everything under control—serve grocery store pumpkin pie at Thanksgiving because she ran out of time. She looked genuinely defeated about it. The week leading up to Thanksgiving is chaos: coordinating travel, prepping side dishes, fielding dietary restriction texts. Dessert always feels like the thing you can push to the last minute, until suddenly it is the last minute. The solution: make desserts now, freeze them, and forget about them until Thursday.
The chocolate pecan tart that gets richer with time
Yield: One 9-inch tart (8-10 servings)
Prep time: 25 minutes
Bake time: 40-45 minutes
Freezing time: Up to 1 month
This tart surprised me. The filling is dense and fudgy—somewhere between brownie and chocolate silk pie—and the pecans add just enough texture to keep it interesting. After a month in the freezer, it sliced cleaner and the chocolate flavor deepened.
For the crust:
- 1½ cups (180g) all-purpose flour
- ¼ cup (50g) sugar
- ½ teaspoon salt
- ½ cup (115g) cold vegan butter, cubed
- 3-4 tablespoons ice water
For the filling:
- 1 cup (240ml) full-fat coconut milk
- 1 cup (175g) vegan dark chocolate chips
- ⅓ cup (80ml) maple syrup
- ¼ cup (60ml) melted coconut oil
- 2 tablespoons cornstarch
- 1 teaspoon vanilla extract
- ¼ teaspoon salt
- 1½ cups (150g) pecan halves, toasted
Instructions:
Make the crust by pulsing flour, sugar, and salt in a food processor. Add cold butter and pulse until mixture looks like coarse sand. Add ice water one tablespoon at a time until dough just comes together. Press into a 9-inch tart pan with removable bottom, making sure to push dough up the sides. Freeze for 15 minutes.
Preheat oven to 350°F (175°C). Line the crust with parchment and fill with pie weights or dried beans. Bake for 15 minutes, remove weights and parchment, then bake another 5 minutes until lightly golden. Let cool completely.
For the filling, warm coconut milk in a saucepan over medium heat until steaming. Remove from heat and add chocolate chips, stirring until completely smooth. Whisk in maple syrup, melted coconut oil, cornstarch, vanilla, and salt until glossy and uniform.
Arrange toasted pecans across the bottom of the cooled crust. Pour chocolate filling over pecans—it should come nearly to the top of the crust. Bake for 15-20 minutes, until the filling is just set around the edges but still has a slight jiggle in the center (like a just-set custard).
Cool completely at room temperature, then refrigerate for at least 2 hours before freezing.
To freeze: Once fully chilled, wrap the entire tart pan tightly in plastic wrap, then again in aluminum foil. Freeze for up to 1 month.
To serve: Move to the refrigerator 4-6 hours before serving (overnight works too). The texture is best slightly chilled, not frozen-solid or room temperature.
Critical tip: Don't skip toasting the pecans. Five minutes in a 350°F oven makes them fragrant and brings out their sweetness. The difference is noticeable. (Note: For nut allergies, substitute toasted pumpkin seeds or omit entirely—the tart will still be rich and delicious.)
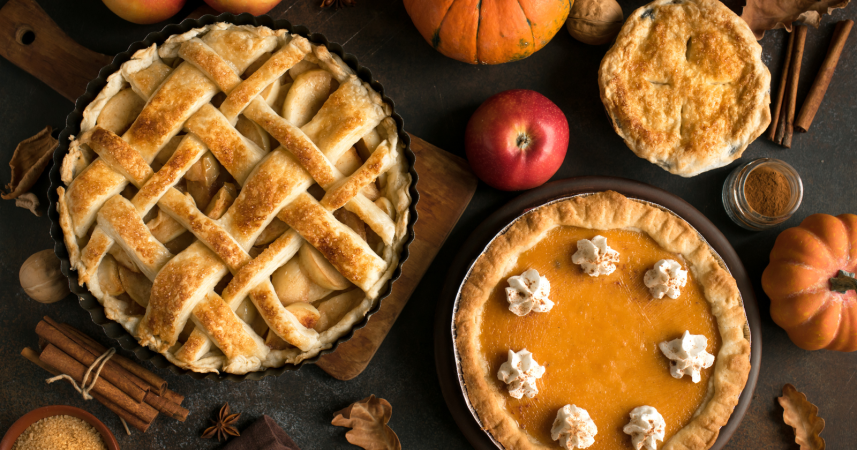
The apple galette that actually holds together
Yield: One 12-inch galette (8 servings)
Prep time: 30 minutes
Bake time: 40-45 minutes (50-55 if baking from frozen)
Freezing time: Up to 2 months
I've made a lot of galettes that turned into apple soup mid-slice. This one stays intact because the apples are partially cooked before assembly, which drives off excess moisture. The crust is sturdy enough to handle the filling but still flakes when you cut into it.
For the crust:
- 2 cups (250g) all-purpose flour
- 1 tablespoon sugar
- ¾ teaspoon salt
- ¾ cup (170g) cold vegan butter, cubed
- 6-8 tablespoons ice water
For the filling:
- 3 pounds (about 6 medium) tart apples (Granny Smith or Honeycrisp), peeled, cored, sliced ¼-inch thick
- ⅓ cup (65g) sugar
- 2 tablespoons lemon juice
- 2 tablespoons cornstarch
- 1 teaspoon cinnamon
- ¼ teaspoon nutmeg
- 2 tablespoons vegan butter
For assembly:
- 2 tablespoons apricot jam, warmed (or maple syrup)
- 1 tablespoon plant milk
- 1 tablespoon coarse sugar
Instructions:
Make the crust by combining flour, sugar, and salt in a large bowl. Cut in cold butter with a pastry cutter or your fingers until mixture resembles coarse crumbs with some pea-sized pieces remaining. Add ice water one tablespoon at a time, mixing gently, until dough just holds together when pressed. Form into a disk, wrap in plastic, and refrigerate for at least 30 minutes.
For the filling, toss apple slices with sugar, lemon juice, cornstarch, cinnamon, and nutmeg in a large skillet. Cook over medium heat, stirring occasionally, for 8-10 minutes until apples have softened slightly but still hold their shape. They should release their juice and then reabsorb most of it. Remove from heat, stir in butter, and let cool completely.
Roll chilled dough on a floured surface into a 14-inch circle (doesn't need to be perfect—rustic is the point). Transfer to a parchment-lined baking sheet.
Arrange cooled apple filling in the center of the dough, leaving a 2-inch border. The apples should be mounded slightly in the center. Fold the edges of the dough up and over the filling, pleating as you go. Brush the crust with plant milk and sprinkle with coarse sugar.
To freeze unbaked: At this point, place the entire baking sheet in the freezer for 1 hour until the galette is solid. Then wrap tightly in plastic wrap and aluminum foil. Freeze for up to 2 months.
To bake fresh (without freezing): Preheat oven to 400°F (200°C). Bake for 40-45 minutes until crust is deep golden and apples are bubbling.
To bake from frozen: Preheat oven to 400°F (200°C). Unwrap galette and place on a parchment-lined baking sheet. Bake for 50-55 minutes (about 10 minutes longer than if fresh) until crust is deep golden and apples are bubbling. If edges brown too quickly, tent with foil.
Brush warm galette with warmed apricot jam for a glossy finish.
Critical tip: The pre-cooking step isn't optional. Raw apples release too much liquid during baking, which makes the crust soggy and the filling loose. Ten minutes on the stovetop solves both problems. (For gluten-free, use a 1:1 baking flour blend in the crust—the pre-cooked filling helps GF crusts stay together better.)
The pumpkin cheesecake bars that slice cleanly every time
Yield: 16 bars
Prep time: 20 minutes
Bake time: 45-50 minutes
Freezing time: Up to 2 months
I tested this recipe specifically for freezing because regular pumpkin pie can get watery when thawed. These bars have a cheesecake base that stays creamy and dense, and they slice into perfect squares even straight from the freezer.
For the crust:
- 2 cups (200g) graham cracker crumbs (check they're vegan)
- ¼ cup (50g) sugar
- ½ cup (115g) melted vegan butter
For the cheesecake layer:
- 16 ounces (450g) vegan cream cheese, softened
- ½ cup (100g) sugar
- 2 tablespoons cornstarch
- ¼ cup (60ml) plant milk
- 1 teaspoon vanilla extract
For the pumpkin layer:
- 1 (15-ounce/425g) can pumpkin puree (not pumpkin pie filling)
- ½ cup (100g) brown sugar
- 1 teaspoon cinnamon
- ½ teaspoon ginger
- ¼ teaspoon nutmeg
- ¼ teaspoon cloves
- ¼ teaspoon salt
Instructions:
Preheat oven to 350°F (175°C). Line a 9x9-inch baking pan with parchment paper, leaving overhang on two sides for easy removal.
Mix graham cracker crumbs, sugar, and melted butter until mixture resembles wet sand. Press firmly into the bottom of prepared pan. Bake for 10 minutes until lightly golden. Let cool slightly.
For the cheesecake layer, beat softened cream cheese, sugar, and cornstarch until completely smooth with no lumps. Add plant milk and vanilla, beating until fluffy. Spread evenly over the cooled crust.
For the pumpkin layer, whisk together pumpkin puree, brown sugar, cinnamon, ginger, nutmeg, cloves, and salt until smooth. Pour carefully over the cheesecake layer, spreading gently to avoid mixing the layers.
Bake for 35-40 minutes until the pumpkin layer is set around the edges but still has a slight jiggle in the center. The cheesecake layer should be firm.
Cool completely at room temperature, then refrigerate for at least 4 hours before freezing.
To freeze: Once fully chilled, use the parchment overhang to lift the entire slab out of the pan. Cut into 16 squares. Wrap each bar individually in plastic wrap, then store all bars in a freezer-safe container or bag. Freeze for up to 2 months.
To serve: Remove from freezer and let thaw in the refrigerator for 2-3 hours, or at room temperature for 45 minutes. The bars slice cleanest when slightly chilled rather than fully room temperature.
Critical tip: Soften the cream cheese completely before mixing. Cold cream cheese creates lumps that won't smooth out, and those lumps become icy spots when frozen. These bars work well frozen because they're dense and fat-rich—the cream cheese provides enough fat to stay creamy rather than forming ice crystals like high-moisture desserts do.
Why these three freeze so well
Dense, fat-rich desserts hold their structure when frozen because there's less free moisture to form ice crystals. The chocolate tart's filling is essentially a ganache, which stays stable. The galette's pre-cooked filling has reduced water content, and the crust never absorbs liquid. The cheesecake bars have enough fat from the cream cheese to stay creamy rather than icy. I've stored all three for different lengths of time—the tart is best within three weeks (pecans can taste stale after that), the galette actually improves with freezing, and the cheesecake bars last the full two months without noticeable change.
I'm freezing all three desserts this weekend. Next Wednesday I'll move the chocolate tart to the fridge, Thursday morning I'll pull the cheesecake bars, and the galette goes straight from freezer to oven while the turkey roasts. When Rebecca asked what I was making this year, I told her I'd be done before Monday.